Typesetting automation
Written on November 24, 2015 by mrzool
TweetA plain-text workflow for painless production of personal documents & offline correspondence—featuring Pandoc, LaTeX, and a simple makefile
I have become pretty obsessed with typesetting automation lately. As a freelancer, I need to write letters, contracts and invoices on a regular basis. I wasn’t happy with the standard solution of using graphical (and proprietary) software like MS Word or InDesign to do this. I know this is the common choice for most people out there, but for someone used to work with incredibly fast and powerful text manipulation tools like Vim and the Unix shell, pointing-and-clicking and hunting for buttons in a bloated GUI environment wasn’t really cutting it.
The ‘scriptability’ of an interface is the ease with which it can be manipulated by other programs. Scriptable programs are readily usable as components by other programs, reducing the need for costly custom coding and making it relatively easy to automate repetitive tasks. […]
Unix programmers, administrators, and users develop a habit of thinking through the routine procedures they use, then packaging them so they no longer have to manually execute or even think about them any more. This habit depends on scriptable interfaces.
The system I had in mind would produce perfectly typeset documents in an automated fashion using only plain text, a text editor, and lean, open-source CLI utilities. Its workflow would be simple, repeatable and portable, with as little overhead as possible—that is, no complicated setup and dependencies reduced to a minimum.
The project tex-boilerplates is the result of my effort. It’s a simple system that provides you with a basic skeleton for painless and automated typesetting of three common types of documents: letters, invoices and CVs/résumés.
The three boilerplates have the same structure and work in a very similar way.
They are all available on GitHub and provide a README that explains in detail dependencies, installation and usage. You can refer to it to learn about the individual differences in each of the boilerplates.
For this article, I have picked letter-boilerplate to walk you through a typical workflow. Let’s look at the basic structure of the repository:
├── README.md
├── letter.md
├── details.yml
├── template.tex
└── makefile
Here’s what every file is about:
README.md: Info on dependencies, installation, and usage.details.yml: A YAML file for content and metadata.letter.md: A markdown file to write the actual letter.template.tex: A simple LaTeX template that deals with style, layout and typography.- A
makefilecontaining the Pandoc command that creates the PDF.
Edit: I’ve recently merged details.yml into letter.md. Now, the YAML metadata block is embedded as frontmatter at the beginning of letter.md instead of living in a dedicated file. Everything else stayed the same.
A typical workflow
Let’s say I need to write a letter. This could be a job application letter, a legal statement for my lawyer, or a pitch for a client.
First, I clone the letter-boilerplate’s repository to my machine, move into it and get rid of the .git folder with this one-liner:
git clone https://github.com/mrzool/letter-boilerplate.git my-letter && cd my-letter && rm -rf .git/
Next, I copy a PDF scan of my signature (that I created using this method and I conveniently keep in my Dropbox) and paste it in the current directory:
cp ~/Dropbox/signature.pdf .
After this, I’m all set. Now I can open letter.md in Vim and write my letter in Markdown (let’s pretend that it’s 1867 and I’m Friedrich Nietzsche writing to his pen pal Carl Freiherr von Gersdorff):
Dear Friend,

I am a bombardier in the second mounted division
of the Fourth Horse Artillery.

[...]

Your devoted friend,
When I’m done writing to my friend Carl, all there’s left to do is editing details.yml with names and addresses, taking care of preserving the already present data structure:
# Letter's details
author: F. Nietzsche
city: Naumburg
from:
- Artillerieregiment, 8. Batt.
- Nordstraße 15, Naumburg
to:
- Carl Freiherr von Gersdorff
- Stresow-Kaserne I
- Grenadierstraße 13–16
- 13597 Spandau
For your reference, this is the part of template.tex where I grab the data above:
% Where I print my name and address
\small
\textsc{\textbf{$author$}}
$for(from)$
\textbullet{} \textsc{$from$}
$endfor$

\vspace{1em}

% Where I print my recipient's name and address
\normalsize \sffamily
$for(to)$
$to$\\
$endfor$

\vspace{3em}

% Where I print city and today's date
\rmfamily
\begin{flushright}
$city$, \today
\end{flushright}

\vspace{1em}

% The special variable $body$ expands to the
% content of letters.md converted to TeX
$body$
After saving details.yml with my data, all there’s left to do is running make on my prompt. This will result in the following command being executed:
pandoc details.yml letter.md -o output.pdf --latex-engine=xelatex --template=template.tex
What’s happening there? I’m leveraging the powerful conversion and templating abilities of Pandoc to do most of the work. The command above concatenates details.yml and letter.md and passes them as input to pandoc, which uses their content to populate template.tex on the fly and pipes the result to XƎTeX, that parses then the whole thing and finally outputs a PDF. That might seem complicated, but it’s the computer, not me, that has to go through the whole process. I just have to run make in the terminal for the magic to happen automatically.
After that, I’m done. I have a PDF ready to be emailed, faxed or printed out. If you’re on OS X, you can now run open output.pdf in your terminal to inspect our newly created PDF (on Linux, xdg-open or gnome-open will probably do the trick). This will look pretty much like this:
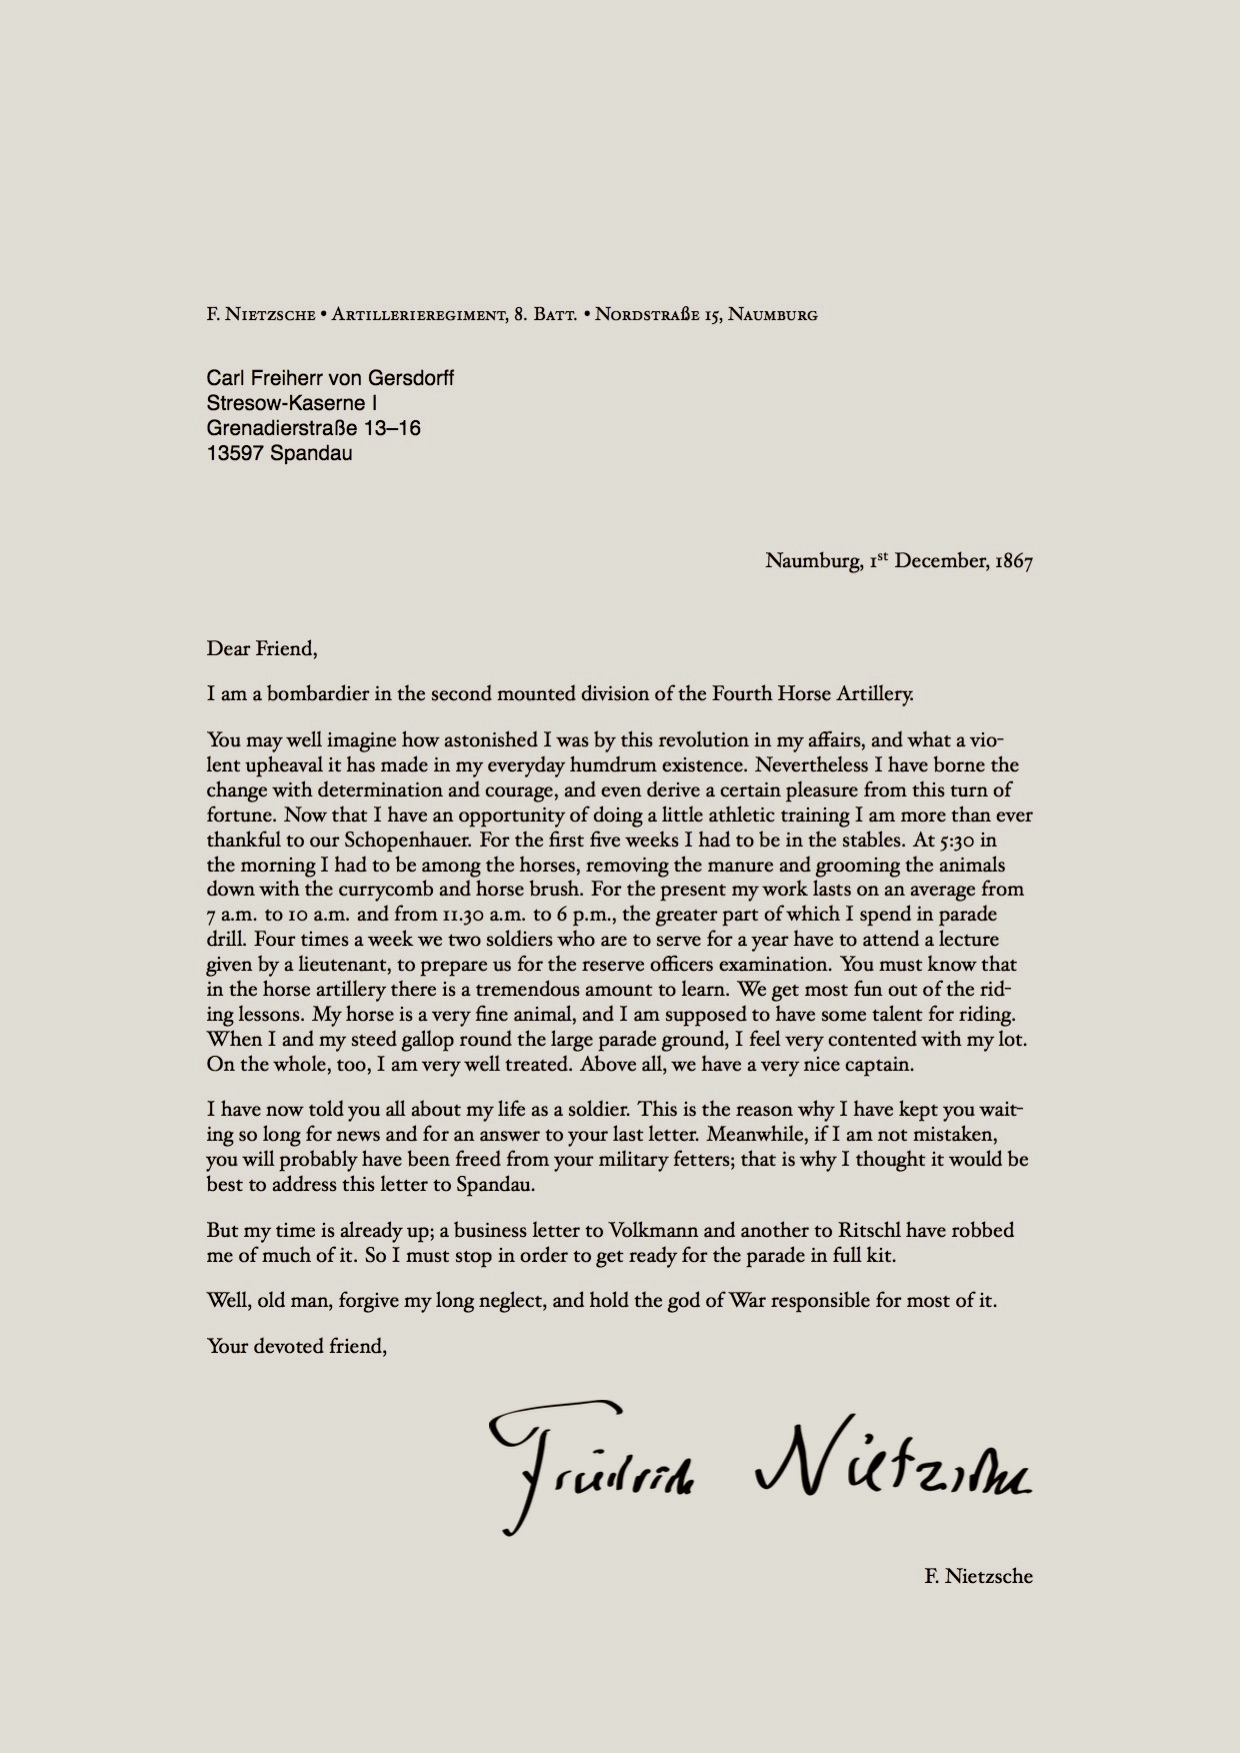
This is a high-quality output [PDF] produced by the most advanced typesetting system available, trusted by thousands of scientists, academics and publishers around the world to typeset advanced mathematical notation with elegance and precision, so you can be sure it can handle the modest needs of basic document production. No fiddling with layout and styling in MS Word or LibreOffice was involved in order to produce this output, nor was painful debugging of LaTeX code. And I have never had to leave the terminal.
Now we are done with the creation of the document. Optionally, we can thake a further step and tweak the document’s look and feel by editing the built-in settings.
Playing with the settings
Some basic options are available at the bottom of details.yml. Let’s see what they do:
# Settings
mainfont: Hoefler Text
altfont: Helvetica Neue
monofont: Courier
lang: english
fontsize: 10pt
geometry: a4paper, left=35mm, right=35mm, top=50mm, bottom=25mm
# letterhead: true
Everything in there is pretty straightforward. The first three options allow you to choose the typefaces for your document.
mainfontsets the font for everything.altfontsets the font for the recipient’s address.monofontsets the font for code blocks and such.
The best parameter to use here is the family name of your chosen font. This is in most cases pretty intuitive (e.g. Hoefler Text, Helvetica Neue, Adobe Garamond Pro are all working options—as long as you have these fonts installed on your system), but, in case of file not found issues, you can use utilities like Font Book (OS X) or fc-list (Linux, OS X) to inspect the metadata of your font of choice and find the right definition to use.
The language option sets the main language through the LaTeX package polyglossia. That’s important to load the proper hyphenation patterns, display the date in the right format (March 3, 2015 becomes 3. März 2015 with language set to german), adapt some typographical conventions, and a number of other things. The package documentation [PDF] introduction offers a good overview.
The fontsize option shouldn’t need any explanation. Its only quirk is that, due to LaTeX limitations, the only values allowed are 10pt, 11pt and 12pt.
The geometry option takes a string that is used to set document-wide layout options through the geometry package. The boilerplate provides some defaults for the margins, but there are a lot more things that you can customize with this package. Check out this page for a good overview and the official package documentation [PDF] if you want to dig deeper.
The last option, letterhead, is admittedly a bit of a hack. If uncommented and set to true, it activates the wallpaper package in the template. This package searches for a file named letterhead.pdf in the root directory and prints it on the PDF before compiling the rest of the document. This comes in handy if you have a personal or company letterhead and want to use it in your letter. More info on how this works below.
Transforming our letter
Now let’s see how we can dramatically alter the look and feel of our letter just by changing a couple of options. I will change mainfont to Gill Sans, include a nice letterhead I have built with InDesign (that I have shamelessly copied from the example given in Matthew Butterick’s Letterhead Advices), and redefine my margins to accomodate the new layout:
# Settings
mainfont: Gill Sans
altfont: Helvetica Neue
monofont: Courier
lang: english
fontsize: 10pt
geometry: a4paper, left=90mm, right=22mm, top=22mm, bottom=22mm
letterhead: true
Now that I have activated the wallpaper package by setting letterhead to true, I need to import my letterhead file. Just like my signature, I keep that in my Dropbox as well:
cp ~/Dropbox/letterhead.pdf .
I will also comment out the code that prints the sender address in template.tex, because our address is now visible in the letterhead and we do not need that bit anymore:
% \small
% \textsc{\textbf{$author$}}
% $for(from)$
% \textbullet{} \textsc{$from$}
% $endfor$

% \vspace{1em}

\sffamily
$for(to)$
$to$\\
$endfor$
Now let’s run make && open output.pdf. This is what we get:
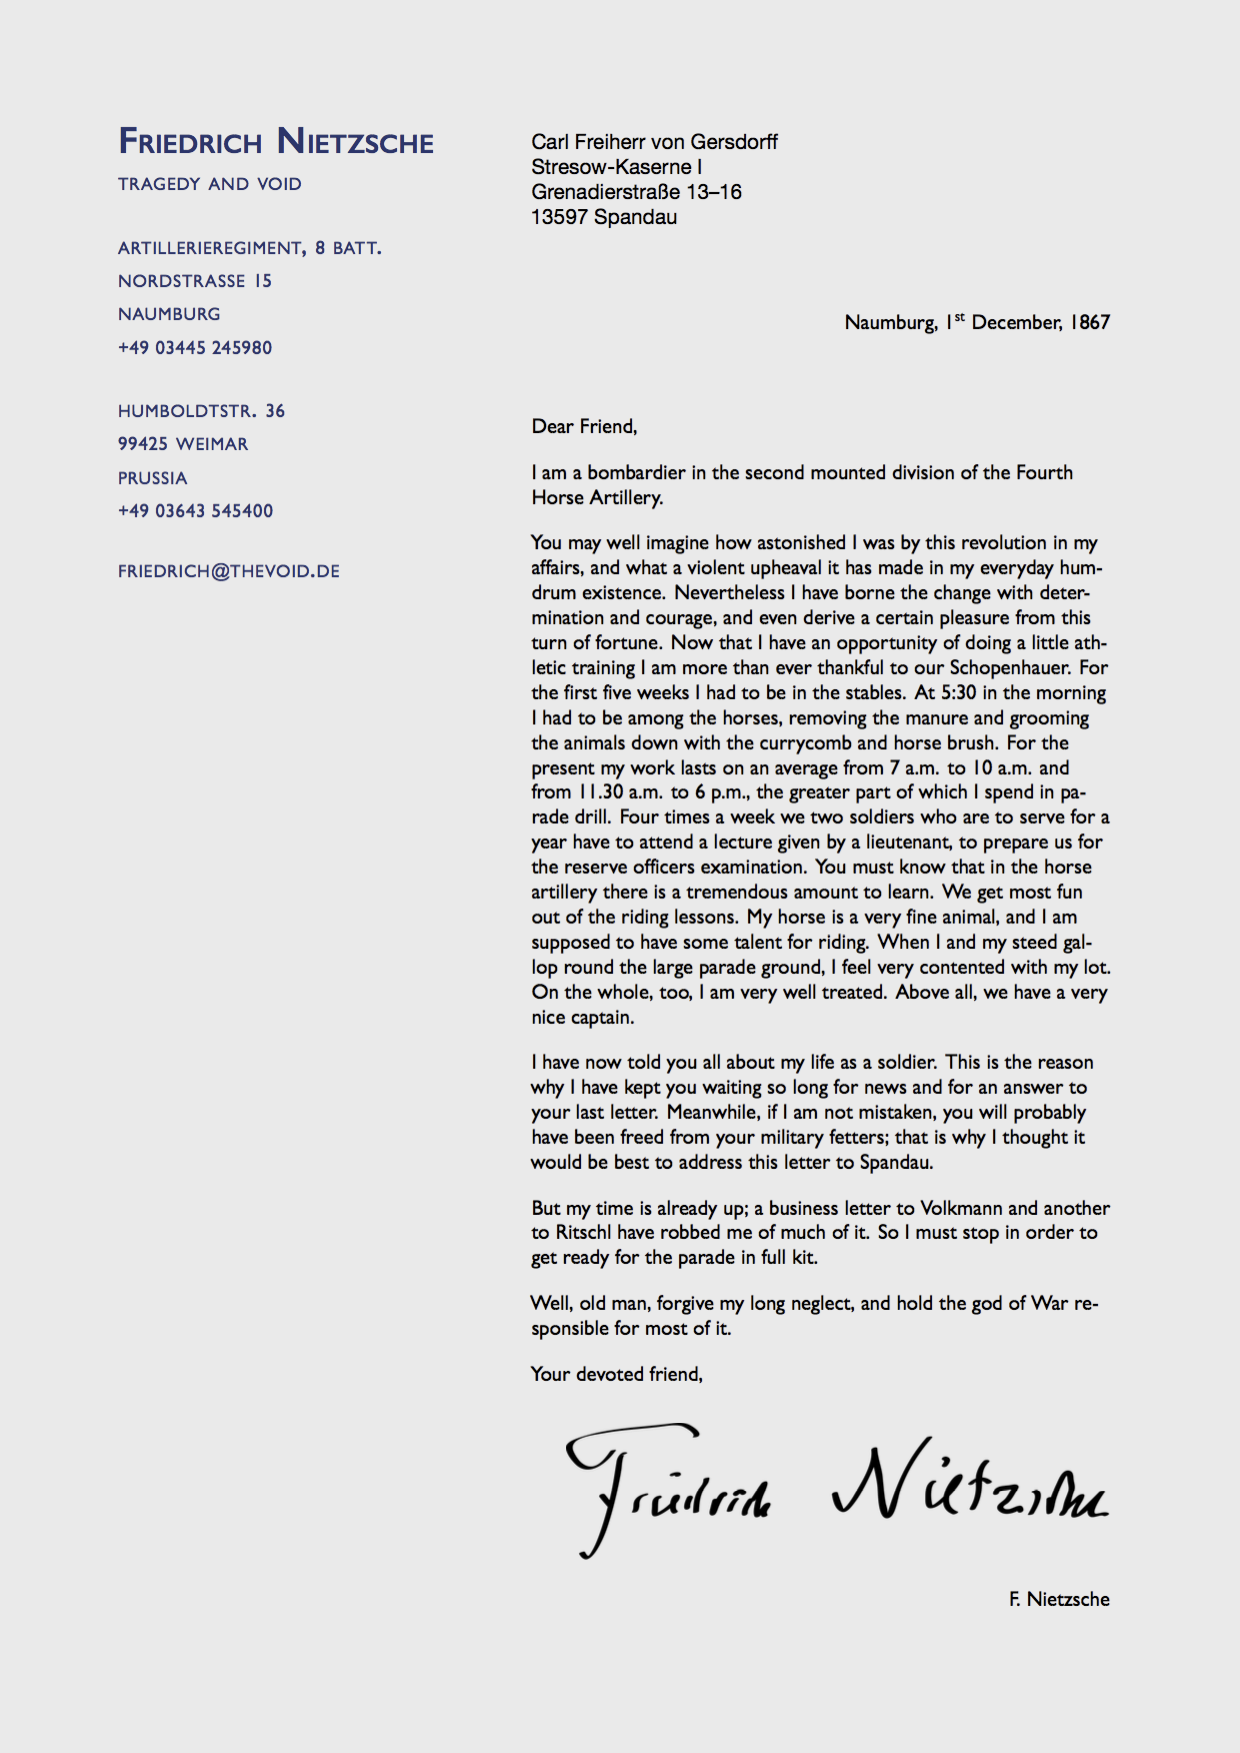
That is quite a transformation [PDF]. Our custom letterhead gets printed by wallpaper, our body text lives now in a narrower column on the right thanks to geometry, and the beautiful sans-serif Gill Sans gives our letter a fresher look.
Conclusion
There is no excuse for bad typography. Just like proper dress and grooming make you look sharp when interacting with others, good typography adds value to your documents and helps getting your message across. The system described in this article yields formidable results with very little hassle. Once you have Pandoc and LaTeX installed on your system, getting started with a new document is just a git clone away.
Remember: all this is not limited to formal letters. Producing great-looking invoices and slick, professional CVs is just as easy. Make sure to check out the website of the project for a quick overview of what you can expect, and refer to the READMEs on Github for more detailed instructions. Have fun!
Recommended readings
Interested in knowing more about plain-text workflows and typesetting automation with Pandoc and LaTeX? Make sure to save this small selection of articles to your Instapaper:
- The Beauty of LaTeX by Dario Taraborelli
- Why Microsoft Word Must Die by Charlie Stross
- Sustainable Authorship in Plain Text using Pandoc and Markdown by Dennis Tenen and Grant Wythoff
- Store everything in text files by Leo Babauta
- Why I do my résumé in LaTeX by Dan McGee
Further resources
Some resources on the tools and technologies mentioned in this article:
- These LaTeX docs cover most of the basics and are surprisingly kind to the beginner.
- Refer to pandoc’s documentation to learn more about how templates work.
- The YAML syntax is quite simple but has its quirks. Check out this overview to make sure you get everything right.
- Follow the TeXtip Twitter account.
- Make some new friends on the TeX-LaTeX Stack Exchange.
- Matthew Butterick’s Practical Typography is a required reading for anyone dealing with document production of any kind.